Because Jennifer asked so nicely. As the Japanese proverb goes, if you flatter a pig enough it will climb up a tree. This won’t work for anyone else who tries it, btw. Dungeon-crawlers are very import-friendly things, but you should make sure you can follow a Japanese FAQ in a pinch if you get stuck before you start one. Aww, now I’ve broken my promise not to talk about Entaku no Seito ever again. But it’s such a fun game, I wanna play again…
Update from March 22, 2021: A remake of Entaku no Seito was recently released in English as “Saviors of Sapphire Wings.” However this FAQ is based on the PSP version from 2012. Thus it may not be accurate at all for the newer game, so Follow this FAQ at your own risk!
Table of Contents (Ctrl+F the four-letter code to skip to that section)
1. Leveling up guide [LEGU]
2. Useful items [USIT]
3. Prologue [PRUE]
4. Fumi Valley [FUVA]
5. Goblin Fort [GOFO]
6. Rondoel [ROEL]
7. Journey to Arlentil [JOAR]
8. Arlentil [ARIL]
9. Union Skills [UNSK]
10. Deep Forest [DEFO]
11. Inshilin Shrine Island [INIS]
12. Eselgard Fortress [ESFO]
13. Classes, Skills and Spells [CLSS]
14. Favorite foods [FAFO]
15. Valhall Mines [VAMI]
16. Mist Isle [MIIS]
17. Ethlin Shrine [ETSH]
18. Gromburg [GOBU]
19. Path of the Dead [PADE]
20. Demon Castle Greygol [DCGR]
21. Post game [POGA]
Guide to what stats to level up [LEGU]
Since you only get one point per level up and EXP is so rare, there isn’t much margin for error. It’s hard to completely screw up a character, but you can make things easier for yourself by focusing on the stats that a party member really needs.
力 = Strength. Improves physical attacks. Raise for physical attackers, ignore for magic users.
知 = Wisdom. Improves magic attacks. Increases MP. Raise for magic attackers, ignore for everyone else.
神 = Piety. Improves healing magic. Improves damage from light skills. Improves resistance to status effects. Increases MP. Raise for support skill users, anyone who needs more MP.
体 = Vitality. Increases HP. Improves Defense. Quite important stat. You won’t go wrong putting a few points into this from time to time.
敏 = Agility. Improves dodging. Improves accuracy. Improves attack for sub-weapon. Improves speed in turn order. Most important stat. Raise for everyone except healers. If you level up and don’t know what to add points to, add it to Agility. Definitely raise Agi if you find your characters missing all the time.
運 = Luck. Improves attack for non-elemental magic. Improves activation rate of all luck-based skills. Improves chance of avoiding status effects. Put a few points here from time to time.
So, for example, for someone like Eltha you would ignore Strength and Piety (until/unless you give her a subclass), largely ignore Luck, put the majority of points into Wisdom, and put a few points into Vitality and Agility so her magic doesn’t miss and she doesn’t get OHKO’d all the time. Something like 3 points Wis, 1 point Vit, 3 points Wis, 1 point Agi would do nicely, but it’s your choice to make depending on your needs.
MC will benefit from a balanced build, though you can ignore Wisdom. Focus on Vit and Agi for him/her early on because having MC die is inconvenient and lowers affection across the board. Put a few points into Piety so his/her MP isn’t abysmal near the end, that way you can get some good use out of the Last Desire spell.
Building the rest of the team is up to you.
List of useful items [USIT]
(See here for a list of every item in the game)
| Item name | Meaning | Use |
| 宝箱の鍵 | Chest key | Used for opening treasure chests |
| 魔水晶 不思議水晶 |
Magic crystal Mysterious crystal |
Reveals the mini-map in stages where it is hidden |
| 爆薬 大爆薬 |
Explosive Large explosive |
Bomb, attack item. Also used for breaking bombable walls. Big bomb, attack item. Also used for breaking bombable walls. |
| Xの小瓶 Xの大瓶 |
Small bottle of X Large bottle of X |
Attack magic, element represented by X. Weaker than magic. More powerful version of the above. Has its uses. |
| 傷薬 妖精の薬 上傷薬 精霊の薬 特効薬 エリクサー |
Potion Fairy medicine High Potion Spirit medicine Super medicine Elixir |
You know what a potion does. Heals all party members a little. You know what a hi-potion does. Heals all party members moderately. Heals one party member’s HP to full. Heals one party member’s HP to full and cures all status ailments. |
| 毒消し | Poison remover | Antidote. |
| 気付け薬 | Restorative | Cures paralysis |
| 万能薬 | Panacea | Cures all status ailments. |
| けむり玉 | Smoke ball | Use to run away from all battles (does not work on bosses). |
| 不死鳥の羽 不死鳥の尾羽 不死鳥の涙 竜神の血 |
Phoenix feather Phoenix tail feather Phoenix tear Dragon god’s blood |
Revives party member with 1 HP (cannot be used in battle) Revives party member with 1 HP (can be used in battle) Revives party member with full HP (cannot be used in battle) Revives party member with full HP (can be used in battle) |
| 進路指導書 | Guidance booklet | Used to teach students a sub-class. |
| 魔法の聖水 | Magic holy water | Repels weaker enemies. |
| 悪魔の壷 | Devil’s pot | Dispels any buffs the enemy party has cast on itself. |
| 天使の鏡 | Angel’s mirror | Prevents enemy from dispelling your buffs once. |
| 帰還の鏡 | Return mirror | Warps you back to the nearest town. Always have at least one on you. |
| フェイクドール | Fake doll | Prevents enemy from taking a party member out of battle. |
Prologue [PRUE]
- Just wander around and fight whatever comes your way. You can’t lose any of the battles here. Pick whichever option you like when the choice comes up, makes no difference.
- Create your new character and start out in Fumi Valley.
Fumi Valley [FUVA]
- Enter Fumi Valley and fight the 2 goblins that show up, then leave and go to Fumi Village.
Fumi Village
- Get through the talking scenes and pick whatever option you like.
- The village head will ask you to save Saul and Lolon. If you ask him for money, he will give you 500g. The Missing Mygmy quest begins.
- You can sell the gold coin Merlin gives you. It’s just an example of the kind of stuff you can sell for cash – anything marked treasure (宝飾品). If there’s anything you shouldn’t sell, I’ll tell you before you start the stage.
Fumi Valley
- Explore till you find Saul then beat 4 x Lv. 3 Scavengers to save him.
Conversation choice: “Did you come to save Lolon?”
・1st choice →Saul’s soul gauge goes up
・2nd choice →Saul’s soul gauge goes down
・3rd choice →No change.
I’m going to leave out conversation choices unless they’re important. Soul gauges can be raised more effectively by feeding your party delicious food and keeping them alive in battle than by playing Yes-man to their questions.
Saul joins your party. Walk a little further to meet Eltha. She joins your party too. Keep her in your active party forever and ever if you plan to take on the postgame dungeons.
Further north there’s a tutorial battle with 2 x Lv. 1 Pop worms and 2 x Lv. 1 Mandragora. It’s there to teach you the important of using Eltha’s magic to hit elemental weaknesses. Pass through the northern gate to reach the Goblin fort.
Goblin Fort [GOFO]
There’s an event at (X:9 Y:2). Fight event battle.
Meet Popolog at (X:12 Y:5). Explore the room to active the switch and open the gate that was locked before.
There’s a barrel with fruit in it (useful bait for this stage) at (X:9 Y:15)
Event battle at (X:12 Y:17). Only occurs once you choose [前進する] so you can go back to the village to heal and equip yourself.
Event battle: Cyclops. Good luck!
If you’re wise you’ll go back to the village again for healing, then move north.
Sky Castle Valley
Meet Mucab again at (X:8 Y:12). Lolon joins the party. Boss battle.
Boss battle: Mucab & 2 Hobgoblins. Kill ’em all.
Rondoel appears – your future base of operations. Auto-return to Fumi Village.
Fumi Village
Lots of talking. Missing Mygmy quest complete. More talking, then you can use Rondoel’s facilities.
Rondoel [ROEL]
There’s a quest board. You have to fulfill the quest requirements to progress. These ones are just tutorials disguised as quests. Select the quest, go to the main room to discuss it, do requirements, continue.
ロンドエールの見学– Look around the castle.
面談の実習– Practice talking to party members in your room. Come back to your room every time a party member’s soul gauge fills out to have a conversation. Interrupt your exploration if you have to.
調合の実習– Learn to fuse items and cook food in the basement.
ゴブリン砦の制圧– Clear all trap points in Goblin Fort.
After these the optional 「ムカブの打倒」(defeat Mucab) event appears, which you can save till later.
When you’re done with all that, move on to Arlentil.
Journey to Arlentil [JOAR]
Accept the 作戦:アーレンティールへ quest and watch the events. Go to the Rondoel menu (the one with the Rondoel in the sky in the background) and choose to move to Arlentil. Battle against Lich occurs.
※Tip: Apparently the battle is easier if you unequip everyone except MC in advance. Good luck.
Learn to use the Knight’s Bond (騎士の絆) Union skill to prevent charm. More talking.
Union Skills [UNSK]
This is a good time to talk about Union Skills. Only MC can use Union SKills and s/he can only do so if there’s at least one other member alive. You learn new Union Skills depending on the total Soul Rank of all the members in your party. E.g. If you have 5 party members and they’re all at Soul Rank 2 then your total is 10 and you can’t learn any of the higher skills until you rank them up some more. Try to head into a boss battle with a maxed Union Gauge wherever possible.
| Name | Meaning | SP needed |
Total Soul Rank |
Effect |
| 閃光退却 | Flash retreat | 1 | 7 | Party runs away without fail. Won’t work on bosses. |
| 騎士の絆 | Knight’s Bond | 5 | 7 | Blocks 1 charm attack against the whole party |
| 森人の罠 | Forester’s trap | 4 | 7 | Lowers enemy party’s evasion and accuracy a little for 1 turn. Stretches time till enemy leader runs off with treasure by 1 turn. |
| 早駆けの陣 | Quick run formation | 6 | 8 | Party acts first for 1 turn. |
| チーフアサシン | Chief assassin | 8 | 9 | Party makes focused, weak physical attack on one enemy. |
| 魔力のベール | Magic veil | 7 | 10 | Lessens physical/magical damage taken from enemy for 1 turn. |
| 戦士の突撃 | Warrior’s charge | 7 | 12 | Launches focused attack against enemy party. Reduces accuracy and defense that turn. |
| マジックバースト | Magic burst | 12 | 14 | Strengthens all magic attacks allies use that turn. |
| 悪魔の罠 | Devil’s trap | 10 | 16 | Lowers enemy party’s evasion and accuracy for 2 turns. Stretches time till enemy leader runs off with treasure by 2 turns. |
| 疾風の陣 | Gale formation | 12 | 21 | Party acts first for 2 turns. |
| ロードアサシン | Lord assassin | 12 | 24 | Party makes focused physical attack on one enemy. |
| 賢者の罠 | Wiseman’s trap | 15 | 28 | Lowers enemy party’s evasion and accuracy a lot for 3 turns. Stretches time till enemy leader runs off with treasure by 3 turns. |
| 精霊のベール | Spirit veil | 14 | 30 | Lessens physical/magical damage taken from enemy for 2 turns. |
| 流星の陣 | Meteor formation | 18 | 35 | Party acts first for 3 turns. |
| 騎士の突撃 | Knight’s charge | 11 | 36 | Launches focused attack against enemy party. Ignores defense. |
| カイザーアサシン | Kaiser assassin | 16 | 40 | Party makes strong, focused physical attack on one enemy. |
| 円卓の絆 | Round table bond | 8 | 40 | Blocks 2 charm attacks against the whole party. |
| アーレンバースト | Arlen burst | 24 | 42 | Strengthens all magic attacks allies use for 2 turns. |
| 不死鳥のベール | Phoenix veil | 21 | 50 | Lessens physical/magical damage taken from enemy for 3 turns. |
| 英雄の突撃 | Hero’s charge | 15 | 60 | Launches high-accuracy focused attack against enemy party. Ignores defense. |
| マァリンバースト | Merlin burst | 36 | 70 | Strengthens all magic attacks allies use for 3 turns. |
| 友愛の絆 | Bond of love and friendship | 12 | 80 | Blocks 3 charm attacks against the whole party. |
Arlentil [ARIL]
Even more talking. Meet Rumi. She joins our party. At first her Soul Rank is capped at 3, but we’ll do a quest to uncap it later. Try to max out her Soul Rank whenever possible for an easier time later.
Deep Forest [DEFO]
・Some areas look like dead ends but will let you pass through if you investigate. I’ll let you know which ones.
・Pick up anything you find lying at your feet. You get the 火薬草 (gunpowder herb) synthesis item. See my tips to learn what to do with these.
West (X:7 Y:7) Meet a ghost. The 課題:モルロックの亡霊 quest beings.
Complete the events at West (X:9 Y:17) and East (X:17 Y:3) and you’ll be able to warp to those points from the gate.
East (X:1 Y:19) Hidden path to Morlock Zu Nuta Village (back gate)
East (X:10 Y:13) Signboard
East (X:18 Y:5) Hidden path east to Morlock – Demon Forest – (モルロック~魔の森~)
Morlock Zu Nuta Village
(X:12Y:3): Main gate. Fight 3 orcs.
(X:3Y:18): Back gate. You can enter by either gate, no problem.
(X:11Y:16) Chest. Can’t be opened until you defeat the Chimera.
(X:14Y:17) Fight Lv12High Orc and Lv12 Orcs.
(X:15Y:18) Cut the rope to open the door nearby.
(X:17Y:13) Talk to the trapped Orc Chieftain Zu Nuta. He tells you there’s a Chimera boss in 魔の森 that you have to defeat. The way to the forest is locked, so you have to go south and talk to the Trent Dol Boi (ドル・ボイ) to get him to open it. Zu Nuta also asks you to clear all the trap points in the village. If you do, he will open the chest at (X:11Y:16) when you beat the Chimera. If you want to see him later, move to (X:7Y:16).
Meet Bargo, a future party member. Return to Arlentil to file a report. Bargo joins the party. Either Saul or Rumi or Bargo will have to move to the backline. Give that person a spear or a bow.
Morlock Demon Forest
Talk to the trent at (X:17Y:3) and warp to Dol Boi near the Demon Forest. A hidden path will appear at East (X:18Y:5) and a warp trent will appear at West (X:9Y:17)
(X:5Y:16): Hidden path.
(X:9Y:17): Hidden path.
(X:7Y:0): Dol Boi’s village path
(X:14Y:3): Hidden path.
(X:12Y:9): Meet the ghost again. Fight him.
Event battle: Ghost
Use magic + Lolon’s attacks.
The クランの欠片 (Clan Fragment) you receive for winning is an important item. The other item can be sold. モルロックの亡霊 quest complete.
Morlock Dol Boi’s village path
(X:1Y:17)(X:9Y:16)(X:11Y:1)(X:13Y:9): Dead animals on the ground. Investigate them to find bait.
(X:15Y:5): Warp trent
(X:18Y:19): Open gate to enter Demon Forest.
Clear all trap points in Morlock to encounter the Chimera.
Boss battle: Chimera. Fight-o!
Arlentil
After all the talking you can now go to Inshilin.
Inshilin Shrine Island [INIS]
・Equip stuff that’s strong against spirits, like the Elven Blade you just got and the Jewel dagger you got from the Morlock chest.
・Take Eltha with you. There are a few doors and walls you can’t pass through without her in your party.
・Synthesize and take along 4 bombs (爆薬 or 大爆薬) for the bombable walls.
(X:12Y:14): Will eventually become a warp point taking you to various levels in the dungeon.
(X:14Y:10): Cracked wall on the east. Follow the directions to use a bomb to break it open (you did bring a bomb, didn’t you?)
(X:9Y:10): Boss fight against the Kraken.
Boss fight: Kraken. Hope you like sushi!
You can return to Rondoel now to formally add Popolog to your party or wait till later.
Inshilin B1 Prayer Room
(X:1Y:19):Message
(X:1Y:15): Message
(X:4Y:19): Message
(X:4Y:15): Message
(X:6Y:13): Door – 記録の間
(X:9Y:5): Door – 祈りの間
(X:12Y:15): Door – 蔵の間
(X:17Y:19): Barrel containing bomb materials.
(X:18Y:7): Door -「宝物の間」. Locked for now, but you’ll find an ultimate key later.
Inshilin B2 Ceremony Room
(X:0Y:16)(X:2Y:9):Bombable walls.
(X:14Y:9): Bombable wall. Prepare for a fight before breaking.
(X:12Y:13): Unlockable warp point that leads to that warp point near the entrance. Good time to go back and save, non?
Event fight: Basilisk. Go! Fight! Fantastic!
Inshilin B3 Purification room
(X:14Y:9): Message telling you that you have to pass through certain springs and be purified before you can go to the next level.
(X:17Y:17): Unlockable warp point.
(X:16Y:11): Morning spring. Go in.
(X:17Y:1): Go in, touch the spring, that’s one purification done.
(X:8Y:16): Afternoon spring. Go in.
(X:9Y:18): Same process as morning spring.
(X:8Y:18): The lizard man gives you advice if you feed him veggies. You can ignore him ‘cos you have this here FAQ to help. Lucky!
(X:2Y:11): Evening spring. Go in.
(X:3Y:10): Popolog warns about trap floors. Avoid the areas around the pillars.
(X:1Y:1): Evening spring. Do the ritual.
(X:9Y:1): Enter. If you can’t enter, you either did the springs in the wrong order or you left the floor halfway through. Go back and do it again.
Inshilin B4 Burial chamber
・No mini-map, but you can use the magic crystal (魔水晶) you’re given. Watch out for the dark zones and rotating floors.
(X:6Y:18): Bombable wall.
(X:17Y:17): Treasure chest you can’t get till Eltha/Chupp learn to fly at level 30. Wanna stay and grind? 😀
(X:16Y:13): Unlockable warp point.
(X:9Y:16): Talk talk talk then boss fight.
Boss fight: Lich (real name is a spoiler). Oh what the heck, it’s Ol=Eraste. Watch out for her Charm move every 5 turns.
Choose someone to touch the altar. Inshilin events complete.
Rondoel
Mints joins the party. He tells you he can make jewels through synthesis. Either now or later, can’t remember.
Select new quest from bulletin board.
Go talk to Windol (Elf guy in Arlentil) and he’ll tell you about the Star Staff.
Go to world map and move to Eselgard.
Eselgard Fortress [ESFO]
Enter Eselgard from 2F.
Popolog has added a new quest to the bulletin board, check it out later.
Eselgard Fortress 2F Southwest
(X:7Y:16): You’ll be able to enter later once you make the ultimate key (魔元素の鍵) much later in the game.
(X:8Y:16): Locked. You’ll come back later.
(X:15Y:8)(X:18Y:5)(X:18Y:11): Event when you touch any of the doors.
Eselgard Fortress 2F Northwest
(X:8Y:3)(X:8Y:15): Door that can be unlocked with the key of the dead (死者の鍵)
Eselgard Fortress 1F Southeast
(X:11Y:18): Event.
Eselgard Fortress 1F Southwest
(X:9Y:19): Event battle
Event battle: Ol-Servant×2
Follow the man outside. He’ll suggest going back to Rondoel. Prepare for a battle.
Rondoel
Event battle: Harpy ×3
You won’t be able to move Rondoel for a while.
Eselgard Fortress 1F Southeast
You can enter by the main gate now.
Go to the room with the skeletons at (X:9 Y:2). Head for (X:11Y:15) after the conversation.
Boss fight: Charon + 4 Skeletons. I remember having a hard time with this fight, but I’m sure you’ll be fine.
Receive the Key of the Dead for winning.
Eselgard Fortress 2F Northeast
(X:2Y:8): You can jump down and land at 1F Northwest (X:2Y:7).
(X:8Y:2): You can jump down and land at 1F Northeast (X:7Y:2).
(X:8Y:4): You can jump down and land at 1F Northeast (X:7Y:4).
Eselgard Fortress 2F Northwest
(X:8Y:2): Clan fragment. Key component of the Star Staff. Don’t miss it or you’ll have to come back later.
(X:8Y:3): Door that opens with Key of the Dead.
Eselgard Fortress 1F Northwest
Hidden door east at (X:16 Y:13)
Eselgard Fortress 1F Northeast
(X:10Y:2): Pull lever to open iron bars further south.
(X:11Y:3): Another Clan fragment.
Eselgard Fortress Basement Northwest
(X:5Y:7): Lift latch to open northern gate.
(X:12Y:14): Lift latch to open western gate.
Eselgard Fortress Basement Southeast
(X:2Y:8): Bait and clear the trap points all around the basement until a group of red skulls appears. Battle time.
Event battle: Skull Cap and 3 Skeletons
Meet Chupp the fairy. She joins your party. Put her in your party for the next segment.
Eselgard Fortress Basement Northeast
(X:11Y:8): Enter the correct password: 『ちゅうせい』 or 『ちゅうせいしん』 without the quotation marks.
Eselgard Fortress Basement Southeast
(X:4Y:15): Step here to open the metal gate southeast.
Eselgard Fortress Basement Northwest
(X:18Y:0): If you can’t pass this point, it means you don’t have Chupp in your party. What did I tell you?! Why can’t you follow simple instructions blah blah preach preach lecture lecture. Got that?! Now go back and get Chupp.
(X:8Y:19) : Hidden door.
Eselgard Fortress Basement Northeast
(X:0Y:0): Boss battle!
Boss fight: Dragon Zombie. The hardest thing about this battle is keeping Chupp alive.
Lots of talking.
Rondoel
・More talking about Saul’s dad and other family affairs.
Check the bulletin board after talking to Merlin to report on what you’ve been doing so far. Get ready for another battle.
Boss fight: Ol=Piros. Watch out for Charm!
The dragon that shows up is Oblis, guardian dragon of the world. He won’t attack so don’t worry.
Go look for Rumi and talk to her.
Rondoel can move again. Head for the Valhall mines (バルハール大坑道) next after accepting the 作戦:神の洞 quest
You’ll get your last party member, the Samurai Mai. A new quest will appear (作戦:盟約の聖剣) when you get Rumi’s Soul Gauge over 5. You can ignore it now, but you’ll have to do it eventually.
Now that you have your full party together, you can give everyone sub-classes if you wish. I recommend leaving MC and Eltha alone until they learn everything in their original classes, though. The reason for this is that while subclasses allow you to learn and use skills from two classes at once, they also cut the character’s growth in half. Entaku no Seito is stingy enough with EXP as it is without deliberately handicapping yourself.
Classes, Skills and Spells [CLSS]
Variant
MC and <post-game secret character>’s starting class. Cannot be assigned as a sub-class. The Last Desire spell learned at level 45 is so useful that I recommend leaving MC without a subclass until s/he learns it.
If you raise MC as a physical attacker, which you most likely will on a first playthrough, give <Post-game character> lots of Piety and Luck so she can use support spells like Hero’s Song and Aura Whistle while MC attacks.
Skills
| Skill | Level learned |
Effect |
| 光の加護 (Light protection) |
1 | Passive skill that prevents MC from ever being charmed. |
| トライスラッシュ (Tri slash) |
7 | Hit one enemy three times. Need to Focus first. |
| 勇者の歌 (Hero’s song) |
14 | Raises Union gauge SP. May fail, whereupon it will lower SP instead. Raise Piety to improve the success rate. |
| テトラスラッシュ (Tetra slash) |
21 | Hit one enemy four times. Need to Focus first. Accuracy takes a hit. |
| シュバリエール Shuvariel |
28 | Passive skill that makes MC float permanently. Largely useless because MC can’t travel alone, so floating doesn’t help until/unless the other party members can float too. At least the Shuvariel passive skill also increases accuracy and evasion. |
| スタースラッシュ (Star slash) |
35 | Hit one enemy five times. Need to Focus first. Accuracy takes a big hit. |
Spells
| Spell | Level learned |
Effect | MP used |
| オーラ (Aura) |
1 | Recovers HP. | 4 |
| クリーンカース (Clean Curse) |
3 | Purifies cursed items and treasure chests. | 2 |
| エナジースピア (Energy Spear) |
6 | Pierces one enemy with a holy spear of light. | 6 |
| フライトホーム (Flight Home) |
10 | Warps you out of the dungeon. Can’t be used in certain areas. | 7 |
| ヘルスオーラ (Health Aura) |
15 | Cures status ailments. Doesn’t cure KO or charm. | 1 |
| オーラホイッスル (Aura Whistle) |
20 | Cures HP and restores party order to normal. | 10 |
| エナジーブレード (Energy Blade) |
25 | Slashes an enemy group with a sword of light. | 12 |
| ナイトフェイム (Knight Fame) |
30 | Reduces encounters with weak enemies. Lasts 250 steps. | 7 |
| ラストデザイア (Last Desire) |
45 | Magic spell with various possible effects. | 50 |
Last Desire effects – Every time you cast Last Desire you’re presented with three of these options (picked at random) to cast.
| Spell | Effect |
| 勇者の絆 (Hero’s bond) |
Fills Union Gauge to max. SP will return to half of max at the end of battle. |
| 闇の波動 (Dark wave) |
Strengthens spells by 150%. Can’t be stacked, but can be used together with the Union Gauge spells that increase spell damage for devastating effect. |
| 不死鳥の盾 (Phoenix shield) |
Creates a shield of light that completely blocks enemy spells. |
| 大精霊の加護 (Great Spirit’s protection) |
Blocks enemy physical and status attacks. |
| 神の涙 (God tear) |
Cures all status ailments including KO (and charm?) and restores HP to full. |
| 光の翼 (Light wing) |
Raises party member evasion by 30. Probably the least useful Last Desire spell, but can be useful when paired with several casts of Multi-Avoid. |
| マナの泉 (Mana spring) |
Completely refills the MP of all party members except the caster. If you have a healer to spare, that healer can use Mana Transfer the next turn to refill the caster’s MP, yay. |
Fighter
Saul and Bargo’s starting classes. Some of the skills can do a lot of damage, but you need to pump up their accuracy to make sure they aren’t missing all the time.
| Skill | Level learned |
Effect |
| ラッシュ (Rush) |
7 | Attacks an enemy group 3 times (hits one random enemy each time, not all). Need to Focus first. |
| 反撃 (Counter) |
11 | Chance of countering when hit with a physical attack. |
| ファイナルガッツ (Final Guts) |
16 | Chance to survive with 1 HP when hit with a fatal attack. Odds of skill triggering are higher if the character defends. |
| バーサク (Berserk) |
21 | Attacks an enemy group 5 times (hits one random enemy each time, not all). Accuracy takes a hit and damage goes down 20% versus normal attack. Need to Focus first. |
| スマッシュ (Smash) |
28 | One hit that does 300% of normal damage, but only has a 33% chance (approx) to hit. IMO you’re better off sticking to something less flashy but more accurate. |
| ジェノサイド (Genocide) |
35 | Attacks an enemy group 7 times (hits one random enemy each time, not all). Accuracy takes a big hit and damage goes down 30% versus normal attack. Need to Focus first. |
Paladin
Rumi’s starting class. Can be set as a subclass, but only Rumi gets the cosmetic class-up upgrade. This class has a lot of luck-based skills so give them lots of Speed, Vit and Luck points. For the record my Rumi spent most of the game just spamming Devotion.
| Skill | Level learned |
Effect |
| 防御力強化 (Strengthen Defense) |
1 | Raises DEF every time level goes up. Chance of reducing damage from enemy attacks. |
| フロントガード (Front Guard) |
4 | Chance to take a hit for a member in the back row. User must be in the front row. Chance increases when user defends. |
| プロヴィデンスI (Providence I) |
7 | Attack on enemy that ignores defense. User’s own DEF drops to zero that turn. |
| ディボーション (Devotion) |
12 | Defend on turn used, plus chance to take all hits for party members. Does not apply to attacks that hit the whole party or more than one party member. Chance of taking the hit increases as speed, level difference between user and enemy and luck increase. |
| ピアース (Pierce) |
18 | Chance for physical attacks with spears/bows to pierce through enemy ranks to the back row. Effect applies to some skills as well. |
| ホーリーガード (Holy Guard) |
24 | Completely blocks almost all attacks that cause paralysis or instant death. |
| シュバリエール (Shuvariel) |
29 | Rumi-only after classing up. Passive skill that makes Rumi float permanently. Increases accuracy and evasion too. |
| プロヴィデンスII (Providence II) |
35 | Strengthened form of Providence I. More accurate. Reduces user’s defense but not to zero. |
Samurai
Mai’s starting class. Dual Wield is a good skill for fighters and MC to have and the group slashing skills are pretty useful. A skill like MC’s Star Slash that would hit 5 times will hit 10 times with Dual Wield.
| Skill | Level learned |
Effect |
| 二刀流 (Dual wield) |
1 | Equip a one-handed weapon in both hands. Except two-handed weapons like bows and a few one-handed weapons. |
| 斬り込み 壱 (Slash One) |
7 | Hit every member of one enemy group. Attack power is slightly reduced. If you’re dual wielding weapons, both weapons will have the range of the weapon with the longer range. E.g. If you’re wielding a spear (long range) and a sword (short range), your attack will be long-range. |
| 修羅 表式 (Carnage – Main technique) |
14 | Keep hitting an enemy until a) You’re hit by a counterattack, b) either you or the enemy die or c) you hit the enemy a specific number of times. The number of times you hit them goes up with your level. Your defense goes down to zero while you’re using this move. This is a risky skill I haven’t gotten too much use out of, but if you have a character with good evasion plus equipment that raises evasion plus you’ve cast Multi-Avoid or Slow a couple of times, it could be worth the risk. |
| 斬り込み 弐 (Slash Two) |
21 | Hit every member of all enemy groups. Attack power is fairly reduced. If you’re dual wielding weapons, both weapons will have the range of the weapon with the longer range. E.g. If you’re wielding a spear (long range) and a sword (short range), your attack will be long-range. |
| 修羅 裏式 (Carnage – Hidden technique) |
28 | Keep hitting an enemy until a) either you or the enemy die or b) You hit the enemy a specific number of times. The number of times you hit them goes up with your level. Your defense goes down to zero while you’re using this move. See notes on Main technique above. This is even riskier because you don’t get a reprieve once you take a hit. |
| 斬り込み 参 (Slash Three) |
35 | Hit every member of all enemy groups. Attack power is halved, but there are no other penalties for attacking enemies in the back/middle row so all rows take the same amount of damage. If you’re dual wielding weapons, both weapons will have the range of the weapon with the longer range. E.g. If you’re wielding a spear (long range) and a sword (short range), your attack will be long-range. |
| 真・二刀流 (True Dual Wield) |
40 | Equip all kinds of weapons in both hands. Includes most types of two-handed weapons and shields but excludes bows and slings. |
Ranger
Popolog’s starting class. I didn’t get much use of out of it, but it does give boosts to evasion, so it’s a good sub-class for anyone who needs help in that department, e.g. Samurais.
| Skill | Level learned |
Effect |
| レンジャーの勘 (Ranger’s Intuition) |
1 | Notice more quickly when there’s something unusual about an area. Avoid treasure chest traps more frequently (useless). |
| 回避力強化 (Evasion up) |
1 | Boost to evasion every time you level up. |
| 狙撃 (Snipe) |
7 | Fire off a powerful, accurate attack that hits one enemy. Can only be used when equipping a bow. |
| トレジャーハント (Treasure Hunt) |
14 | Increases drop rate of enemy drops. Does not stack even if multiple party members have the same skill. |
| 乱れ撃ち (Random hit) |
21 | Hits 3 members in an enemy group at random. Suffers from reduced damage and accuracy. Can be used with all weapons, not just a bow. |
| 変わり身 (Dodge) |
28 | Chance to dodge an enemy attack. Higher chance if character is defending. |
| 超狙撃 (Super-snipe) |
35 | Fire off a powerful, accurate attack that hits one enemy. Need to Focus first. However if the hit kills the targeted enemy, you can use Super-snipe again the next turn without focusing. Can only be used when equipping a bow. |
Wizard
Eltha’s starting class. Fragile but extremely useful. Packs a punch with magic attacks and has a bunch of useful buffs and debuffs as well. Just keep one in your party forever, okay?
Skills
| Skill | Level learned | Effect |
| マジックウェポン (Magic Weapon) |
1 | Makes equipped weapon do extra damage to spirit enemies. You can cast it on other party members in areas with lots of spirits, but it’s always best to go with spirit-damaging weapons instead to avoid wasted turns. |
| ウィザーボルト (Wizard Bolt) |
7 | Magic attack on one enemy that does not consume MP. Damage done depends on wizard’s remaining HP. Does less damage the more you use it within one battle. Damage rises as wizard’s level rises. |
| バーストマジック (Burst Magic) |
13 | Spell used the next turn does double damage (applies to most spells, but a few are exempt). Stacks with any other magic-strengthening spell or item you care to use. |
| マジックエンハンス (Magic Enhance) |
20 | Passive skill that doubles the strength of all wizard-class spells used. |
| シュバリエール (Shuvariel) |
27 | Eltha-only after classing up. +5 to accuracy and evasion + permanent float. |
| ファストキャスト (Fast Cast) |
34 | Cast the same spell twice in a single turn. No reduction in the MP consumed by each spell. Can be used with Burst magic and other magic-boosting skills. |
Spells
| Spell | Level learned |
Effect |
| ファイアボルト (Fire Bolt) |
1 | Fire attack against 1 enemy. Strong against earth-element enemies. |
| スロー (Slow) |
2 | Reduce 1 enemy’s evasion. Stackable. |
| エアボルト (Air Bolt) |
3 | Wind attack against 1 enemy. Strong against water-element enemies. |
| マジックガード (Magic Guard) |
4 | Throws up a magic guard on one ally, reducing magic and physical damage taken that turn. Always goes first. |
| アクアボルト (Aqua Bolt) |
5 | Water attack against 1 enemy. Strong against fire-element enemies. |
| マルチスロー (Multi-slow) |
6 | Reduce 1 enemy group’s evasion. Stackable. |
| アースボルト (Earth Bolt) |
7 | Earth attack against 1 enemy. Strong against wind-element enemies. |
| アローバリア (Arrow Barrier) |
8 | Shields all allies from arrows, slings and other physical attacks from enemy back rows. Effect lasts the whole battle unless dispelled. |
| ファイアブラスト (Fire Blast) |
10 | Fire attack against 1 enemy group. Strong against earth-element enemies. |
| エアブラスト (Air Blast) |
12 | Wind attack against 1 enemy group. Strong against water-element enemies. |
| アクアブラスト (Aqua Blast) |
14 | Water attack against 1 enemy group. Strong against fire-element enemies. |
| アースブラスト (Earth Blast) |
16 | Earth attack against 1 enemy group. Strong against wind-element enemies. |
| マジックウォール (Magic Wall) |
18 | Throws up a magic guard on all allies, reducing magic and physical damage taken that turn. Always goes first. |
| エビルボルト (Evil Bolt) |
20 | Dark attack against 1 enemy. Strong against light-element enemies. |
| フォースブレイク (Force Break) |
22 | Dispel all magic cast on all enemies. Clears both buffs and debuffs. |
| エビルブラスト (Evil Blast) |
24 | Dark attack against 1 enemy group. Strong against light-element enemies. |
| フォースマジック (Force Magic) |
26 | Creates a magic wall that reduces the damage the party takes from magic spells. Cast outside battle. Effect lasts as long as party remains in the dungeon unless dispelled. |
| マジックブレイク (Magic Break) |
28 | Halves the damage/effect of all magic cast by enemies in battle. Effect lasts through the battle unless dispelled. |
| フォースウイング (Force Wing) |
30 | Raises accuracy and makes the whole party float. Effect lasts as long as party remains in the dungeon unless dispelled. |
| エビルフレア (Evil Flare) |
33 | Dark attack against all enemies. Strong against light-element enemies. |
| メテオフラッシュ (Meteor Flash) |
36 | Very powerful non-elemental magic attack that hits one enemy or ally at random. Sounds too dangerous to use, so I’ve never tried it. |
| デバインウェポン (Divine Weapon) |
39 | Raises the attack of one ally by a lot. Effect lasts through the battle unless dispelled. |
| オメガインパクト (Omega Impact) |
42 | Extremely powerful non-elemental magic attack on all enemies. |
Healer
Lolon’s starting class. I’m a very conservative player, so I never leave home without at least one healer. Mana Convert combined with Mana Recovery II lets the healer refill his/her MP and distribute it to other party members, keeping them firing on all cylinders at all times. You’ll appreciate it when you get there.
Skills
| Skill | Level learned |
Effect |
| ホーリーウェポン (Holy weapon) |
1 | Makes equipped weapon do extra damage to undead enemies. You can cast it on other party members in areas with lots of undead, but it’s always best to go with undead-damaging weapons instead to avoid wasted turns. |
| マナ回復I (Mana Recovery I) |
11 | Recovers MP as you walk around. Amount recovered goes up as Piety stat goes up. Number of steps needed for recovery goes down as base level goes up. |
| マナコンバート (Mana Convert) |
16 | Swap MP with another ally, living or dead. |
| ホーリーシールド (Holy Shield) |
21 | Throws up a shield that blocks enemy physical attacks on the party. Gives out after a few blows. The higher the healer’s level, the more damage the shield can take before collapsing, in theory. In practice the enemies will have gotten stronger as well so the shield will still crumble after a few hits. |
| ヒールエンハンス (Heal Enhance) |
28 | Passive skill that raises effect/damage of healer-class spells by 1.5. |
| マナ回復II (Mana Recovery II) |
35 | Recovers MP as you walk around. Both amount recovered and number of steps needed go up as Piety stat goes up. Replaces Mana Recovery I if I recall correctly. |
Spells
| Spell | Level learned |
Effect |
| キュア (Cure) |
1 | Recover a little HP for one ally. |
| アボイド (Avoid) |
2 | Raise one ally’s evasion. Stackable. |
| キュアポイズン (Cure Poison) |
3 | Cure poison for one ally. |
| ヒット (Hit) |
4 | Raise one ally’s accuracy. Stackable. |
| マルチキュア (Multi-cure) |
5 | Recover a little HP for the whole party. |
| マルチアボイド (Multi-avoid) |
6 | Raise the whole party’s evasion. Stackable. |
| キュアパラライズ (Cure Paralyze) |
7 | Cure paralysis for one ally. |
| マルチヒット (Multi-hit) |
8 | Raise the whole party’s accuracy. Stackable. |
| ハイキュア (High cure) |
9 | Recover a lot of HP for one ally. Heals approx 3x regular Cure. |
| フォースアボイド (Force Avoid) |
10 | Raises evasion for the whole party. Used outside battle. Effect lasts as long as party remains in the dungeon unless dispelled. |
| ホーリーライト (Holy Light) |
12 | Hits one enemy with an arrow made of light. Strong against dark-element enemies. |
| ヘルスキュア (Health Cure) |
14 | Cures one ally of all status effects except charm and KO. |
| フォースヒット (Force Hit) |
16 | Raises accuracy for the whole party. Used outside battle. Effect lasts as long as party remains in the dungeon unless dispelled. |
| レクイエム (Requiem) |
18 | Instant death attack against one enemy. Doesn’t always work. Super-effective against undead enemies. No effect on bosses. |
| ハイマルチキュア (High Multi-cure) |
20 | Recover a lot of HP for the whole party. Heals approx 3x regular Multi-cure. |
| デバインアーマー (Divine Armor) |
22 | Halves physical damage taken by one ally. Effect lasts throughout the battle unless dispelled. |
| ホーリーシャイン (Holy Shine) |
24 | Hits one enemy group with arrows made of light. Strong against dark-element enemies. |
| フォースガード (Force Guard) |
26 | Throws up a guard that blocks any attempt to dispel effects on the party for one turn. |
| フルキュア (Full Cure) |
28 | Recover all HP for one ally. |
| グランドクロス (Grand Cross) |
30 | Instant death attack against one enemy group. Doesn’t always work. Super-effective against undead enemies. No effect on bosses. |
| ハイヘルスキュア (High Health Cure) |
32 | Cures whole party of all status effects except charm and KO. |
| リジェネレート (Regenerate) |
34 | Recovers a little HP for the whole party at the end of every turn. Amount healed is the same as for Cure. Effect lasts throughout battle unless dispelled. |
| リザレクション (Resurrection) |
36 | Resurrects one fallen ally with full HP. |
Alchemist
Mints’ starting class. Mediocre on its own but useful as a sub-class for physical fighters because of Armor and Weapon Mastery.
Skills
| Skill | Level learned |
Effect |
| 調合I (Synthesis I) |
5 | Synthesize basic items on the fly in dungeons. You need to have the ingredients with you and you can only make up to Rank D items. This skill also makes Rank D and E synthesis in the Rondoel basement free. |
| アイテム修練I (Item Training I) |
10 | Use one item twice in the same turn in battle. E.g. Use a potion twice on the same ally instead of once. You need to have two of that item in your inventory. Very useful for buff and debuff items, since the effects stack. |
| アーマーマスタリー (Armor Mastery) |
15 | Strengthens DEF of currently-equipped armor. Adds value of current level to defense stat of armor, e.g +15 if the character is level 15. No effect if character is not wearing armor. |
| アイテム修練II (Item Training II) |
20 | Use one item three times in the same turn in battle. You need to have three of the same item in your inventory. |
| 調合II (Synthesis II) |
25 | Synthesize all items even in dungeons. You must have the ingredients in your inventory. All synthesis in the Rondoel dungeon becomes free except jewelry synthesis. |
| ウェポンマスタリー (Weapon Mastery) |
30 | Strengthens ATK of currently-equipped weapon. Adds value of current level to attack stat of equipped weapon. e.g +15 if the character is level 15. No effect if character does not have a weapon equipped.. |
| アイテム修練III (Item Training III) |
35 | Use one item four times in the same turn in battle. You need to have four of the same item in your inventory. |
Spells
| Spell | Level learned |
Effect |
| リファイン (Refine) |
1 | Remove curses from items and treasure chests. |
| ブラインド (Blind) |
3 | Lower one enemy’s accuracy. Stackable. |
| スリープフォグ (Sleep fog) |
5 | Chance to put 1 enemy group to sleep for 3 turns. |
| バイオガード (Bio Guard) |
7 | Reduces damage/effect of enemy breath attacks and status effect attacks for one ally for one turn. Effect stacks if spell is cast multiple times, e.g. using the Wizard’s Fast Cast skill. |
| ケミカルショット (Chemical Shot) |
9 | Non-elemental magic attack on one enemy. |
| クレイジーフォグ (Crazy fog) |
12 | Chance to confuse 1 enemy group for 3 turns. |
| ブラインドフォグ (Blind Fog) |
15 | Lower one enemy group’s accuracy. Stackable. |
| バイオウォール (Bio Wall) |
18 | Reduces damage/effect of enemy breath attacks and status effect attacks for all allies for one turn. Effect stacks if spell is cast multiple times, e.g. using the Wizard’s Fast Cast skill. |
| サイレントフォグ (Silent Fog) |
21 | Chance to silence 1 enemy group for 3 turns. |
| ケミカルバルカン (Chemical Vulcan) |
24 | Non-elemental magic attack on one enemy group. |
| フォースバイオ (Force Bio) |
27 | Reduces damage/effect of enemy breath attacks and status effect attacks for the whole party. Used outside battle. Effect lasts as long as party remains in the dungeon unless dispelled. |
| ポイズンフォグ (Poison Fog) |
30 | Chance to poison 1 enemy group for 3 turns. |
| マルチリファイン (Multi-refine) |
33 | Clear all curses on all items in the party’s inventory. |
| エレメンタルボム (Elemental Bomb) |
36 | Hits one enemy group with a magic attack that has the Fire, Water, Thunder and Earth element all at the same time. Only does 1 damage to Dark/Light-element enemies. |
Druid
Chupp’s starting class. A good sub-class for healers and wizards, though it has a lot of overlap with the former. Use Charm to get two monsters to do the physical attacking while the character focuses on healing/magic attacks. The best attacking monsters are Dark Kobolds, but in general any monster that gives you a hard time will give enemies a hard time too.
| Skill | Level learned |
Effect |
| 魅了 (Charm) |
1 | Chance to charm an enemy monster into joining your party. Doesn’t work on every monster. Definitely doesn’t work on bosses. There’s a chance that the monster will leave at the start of each turn. After Druid level 20 you can keep 2 monsters in your active party instead of one. |
| 帰す (Return) |
1 | Send a charmed monster back to the dungeon. |
| 交代 (Switch) |
1 | Replace the active charmed monster with a charmed monster held in reserve. |
| ドルイドの目 (Druid’s eye) |
7 | Shows an HP bar for the monster you are fighting. |
| いたわる (Nurse) |
14 | Heals some HP and recovers status effects for a charmed monster. The charmed monster will not leave the party that turn, but it will not attack either. |
| 待機 (Standby) |
21 | Put a charmed monster on standby at the entrance of a dungeon. A charmed monster will normally leave your party when you leave the dungeon, but when you put it on standby you can go out and come back and pick up where you left off. Note: this only applies if you don’t go back to Rondoel when you step out. |
Spells
| Spell | Level learned |
Effect |
| 妖精の粉 (Fairy Powder) |
1 | Recover a little HP for one ally. |
| 毒蛇の牙 (Poisoned snake fangs) |
3 | Physical attack with chance to poison one enemy. |
| 賢者の瞳 (Sage’s Eye) |
5 | Be able to see the true form of all enemies (susses out the identity of hidden enemies). Effect lasts as long as party remains in the dungeon. |
| 妖精の雫 (Fairy Drops) |
7 | Cure poison for one ally. |
| 風の刃 (Wind Blade) |
9 | Physical attack with a chance to instantly kill one enemy. |
| 妖精の怒り (Fairy’s Wrath) |
12 | Weak magic attack on one enemy that does either fire, water, wind or earth damage at random. |
| 魔獣の鼻 (Beast’s Nose) |
15 | Sense traps and abnormalities in dungeons more readily. Effect lasts as long as party remains in the dungeon. |
| 精霊の癒し (Spirit’s Healing) |
18 | Recover a little HP for all allies. |
| 飛翔乱舞 (Flying Dance) |
22 | Physical attack that hits random enemies three times. |
| 精霊の怒り (Spirit’s Wrath) |
26 | Strong magic attack on one enemy that does either fire, water, wind or earth damage at random. |
| 竜の翼 (Dragon Wing) |
30 | Raises evasion and makes the whole party float. Effect lasts as long as party remains in the dungeon unless dispelled. Same effect as Wizard’s Force Wing except raises evasion instead of accuracy. The two spells can be used together. |
| 大竜巻 (Great Tornado) |
34 | Calls up a dragon to blow enemies away. Does not work on bosses, spirits, demons and gods. Enemies do not give EXP when blown away. |
| 妖精の口づけ (Fairy’s Kiss) |
38 | Cures all status effects except Charm and KO for one ally. |
| 巨竜降臨 (Great Dragon’s Descent) |
42 | Powerful non-elemental magic attack on all enemies. |
Favorite foods [FAFO]
This is also a good time to talk about favorite foods, which can be eaten to raise character Soul gauges. The table below doesn’t 100% cover everything everyone likes/hates, but it’s a good enough guide. Foods are especially useful when a character is at like 90% and you’re back at Rondoel and don’t want to go adventuring and have to come back in an hour just to rank up, etc etc. Items with an asterisk (*) are foods the character either loves or hates.
| Character | Likes | Dislikes |
| Saul | Golden pie,* cake,* pudding* Milk, ramen, hamburger, curry, tonkatsu, fried shrimp, marbled steak |
Apple, magic vanilla, Alda caviar, Alda truffle, mature cheese Natto* |
| Eltha | Alda truffle* Vegetable juice, consomme soup, sweet potato, black tea, green saute, fish fin soup, alda caviar |
Ramen, yoghurt, whiskey, coffee Natto* |
| Lolon | Alda foie gras* Beer, all breads, tonkatsu, ramen, golden pie |
Jerky, natto |
| Rumi | Wine,* Alda caviar,* Royal bread,* cake* Golden pie, tonkatsu, sweet potato, chocolate, fairy spice, marbled steak, fish fin soup, fairy spice |
Natto |
| Bargo | Marbled steak* Natto, all steak dishes |
Cake, honey drop, all sweet foods |
| Popolog | Marbled steak,* golden pie,* pudding* Baked leg, baked fish, grilled seafood, thin soup, cocoa, orange juice, milk, yoghurt, cake, ramen, hamburger, curry, tonkatsu, fried shrimp |
Alda foie gras, alda truffle Royal bread* |
| Mints | Alda truffle,* Fairy spice* Magic vanilla, black tea, vegetable soup, magic spice |
Marbled steak Natto* |
| Chupp | Alda truffle,* Royal bread,* edible rock (食岩)* Magic herb, magic basil |
Beer Fairy spice (might be an error in the FAQ. I thought Chupp liked fairy spice) |
| Mai | Fish fin soup* Shellfish sashimi, Fresh fish sashimi, Seafood nabe, Green tea, Alda foie gras, Alda caviar, Natto, Baked fish, all fish dishes |
Tonkatsu Kimchi* |
| Merlin | Light crystal, edible rock | Dark anything |
Valhall Mines: Preparation [VAMI]
You need to have Bargo in your party for this stage. Undead enemies galore, so get weapons and armor good against the undead (不死者) from the shop outside Eselgard/your own stocks.
You will need Mythril Jewels to unlock most of the doors in the mines. Light mythril jewels (光玉) can be used like normal keys, one per Light door. Dark mythril jewels (闇玉) will melt after you’ve taken 20 steps (melts on the 21st step IIRC). You can always come back for more from the source, so keep trying till you find the shortest route between the dark jewel and the dark door.
The crawler enemies will (rarely) drop 窒息しない肺 (lit. non-suffocating lung) items that you’ll need to enter the next dungeon, so if you get any, don’t sell them. Do not sell any バールナイト (baalnite) items you find either – you’ll need them to get the ultimate axe postgame. If you’re lucky enough to find a moonstone (ムーンストーン), hang on to at least one of them for later. You’ll be required to clear all the trap points in the Mines to finish the stage, so bait and clear any you come across. Okay, let’s get ready to go to the mines.
Valhall Mines Holy Era Level Mining Area 1
(X7:Y3): Light jewel door.
(X15:Y4):Light jewel door.
(X10:Y0): Light jewel in a barrel
(X4:Y3): Dark jewel①
(X17:Y9) Dark jewel door (use Dark jewel①)
(X11:Y12): A zombie dwarf will give you hints in exchange for money (you have to leave the dungeon once and return before he shows up). What does a zombie dwarf need money for?
Valhall Mines Holy Era Level Mining Area 2
(X9:Y17): Light jewel door。
(X10:Y10): Dark jewel door (Use Dark jewel①)
(X17:Y10): Check wall for light jewel.
Valhall Mines Holy Era Level Mining Area 3
(X0:Y0): Event battle against 2 Zombie Walkers. Get light jewel for winning.
(X0:Y4): Check barrel for light jewel.
Valhall Mines Holy Era Level Mining Area 2
(X12:Y3):Light jewel door。
(X4:Y3): Get dark jewel ②
(X19:Y5):Dark jewel door (use dark jewel②)
Valhall Mines Holy Era Level Mining Area 5
(X3:Y17): Event. Battle against grunts.
Event battle: 6x Zombie Walker
(X16:Y16): Barrel with light jewel.
(X9:Y11): Beat enemies for light jewel.
(X11:Y9): Dig for light jewel
(X10:Y4): Battle for light jewel
Btw, even though light jewels sell for decent money, and even though you might feel you have more than enough at some point, don’t sell them until you’re absolutely sure you’ve opened every door in the whole mine. You can buy some back in a pinch, but it will cost you big time.
Valhall Mines Holy Era Level Mining Area 4
(X7:Y10):Light jewel door.
(X14:17): Dig for light jewel.
(X12:Y12):Light jewel door.
Valhall Mines Holy Era Level Mining Area 3
(X9:Y3):Light jewel door.
(X6:Y10):Light jewel door.
(X11:Y14):Light jewel door.
Valhall Mines Holy Era Level Mining Area 6
(X17:Y2): Battle for light jewel
(X9:Y9):Light jewel door.
(X9:Y18): Hit barrel for light jewel.
(X9:Y11): Get dark jewel③.
(X9:Y1):Dark jewel door (use dark jewel ③).
(X9:Y4): Get dark jewel ④.
Valhall Mines Holy Era Level Mining Area 3
(X3:Y10):Dark jewel door (use dark jewel④).
(X11:Y8):Dark jewel door (go get another dark jewel④ and use it).
(X14:Y8): Get dark jewel⑤.
Valhall Mines Holy Era Level Mining Area 4
(X6:Y16):Dark jewel door (use dark jewel⑤)
(X4:Y14): Get dark jewel⑥.
(X16:Y10): Dark jewel door (use dark jewel⑥)
(X19:Y6): Break barrel for light jewel.
(X19:Y10): Event battle.
Event battle: Baskul, 2x Zombie Walker King. Baskul uses Charm so be careful.
Apparently you can fight this battle twice if you want. The first time you need to go in without Bargo in your party, then you need to add him and fight again. If Bargo is in your party the first time, you only have to fight them once. No idea if you get double EXP for fighting twice.
Valhall Mines Holy Era Level Mining Area 7
(X16:Y10): Event. You won’t be able to use any Go Home spells or items for a while.
(X10:Y10): Unwinnable battle. When the order to jump down appears, just do it.
Valhall Mines God Era Level Hole
(X8:Y7): Press lever to activate elevator.
(X7:Y8): Elevator. Select floor:
聖暦=Valhall Mines Holy Era Level Mining Area 7
魔暦=Valhall Mines Demon Era Level Hole
神暦=Valhall Mines God Era Level Hole
Valhall Mines Holy Era Level Mining Area 7
(X7:Y8): Elevator
(X7:Y4): Exit to outdoors. Now you can go in and come out on this level. Good time to go out if you need to sell stuff or do some Soul Ranking.
Valhall Mines Demon Era Level Dangerous Mining Area
(X6:Y0):Light jewel door.
(X1:Y2): Break barrel for light jewel.
(X14:Y2): Break barrel for Honey drops x3, fight enemies that appear.
(X12:Y17): Event battle. I found it quite tough, so you might want to walk around it and explore the rest of this level before coming back to fight.
Event battle: Moramitta. Another Charm user. She likes to steal money, so squirrel all your money away in the bank before fighting her.
Once you beat her, she’ll offer to make you a magic item called the Sea Dragon’s Air Sac (海竜の空気袋) in exchange for sparing her life. You need to this to go into the next dungeon, but you can accept her offer and save the quest till later. You’ll need to give her 3x窒息しない肺 to get the item. They can be bought from a store later on for 2,300 each but they also drop from enemies.
Mai’s quest: 課題:マイの仇討 is available now when you check the bulletin board. She’s looking for her master’s murderer. Go talk to the boss at (X3:Y1) in Dol Boi village, Morlock forest. The boss will ask for 10 bird legs (鳥の足) which you can just buy. Give them to the boss then win the ensuing boss fight to clear the quest and uncap Mai’s Soul Ranks.
Valhall Mines Demon Era Level Sealed Mining Area
If you’ve missed any trap points, go back and clear them now or you can’t finish the stage.
(X:6Y:8): Event + boss battle if you’ve cleared the traps like I told you to.
Boss battle: Mythril Golem
Step into the mirror to warp away.
Valhall Mines Blocked Level Sealed Mining Area
(X:9Y:11):Light jewel door.
(X:9Y:5): Exit to new town, Mist Isle.
Mist Isle [MIIS]
Event.
Rondoel
You need to go to the Ethlin shrine to get the Liliath item you’re looking for, but the Ethlin shrine is underwater. If you haven’t gotten the 海竜の空気袋 item from Moramitta, this is the time to do so, because you need it to enter.
Before you continue though, this is a good time do the 騎士カイル (Kyle the Knight) quest and accept Rumi’s 盟約の聖剣 (Holy Sword of Oaths) quest if you haven’t done so already.
騎士カイル (Kyle the Knight) quest
The 騎士カイル quest will appear after you finish Eselgard, but the enemies are a bit tough, that’s why I left off explaining it till now. You’ll need to do this quest to get into the last dungeon and to uncap Saul’s soul rank so it can go higher than 7 and Rumi’s so it can go higher than 5. You’re safe putting it off until you clear the Ethlin shrine, but here are the details anyway:
Take the 騎士カイル quest after beating the Dragon Zombie in Eselgard Fortress and getting the Kyle’s Tag (カイルのタグ) item.
(Background story: Kyle is Saul’s dad and for a long time Saul thought his dad had abandoned him, but actually he was a knight who died defending his kingdom.)
Go all the way back to Fumi Village and talk to the chief. Take a piece of chocolate with you.
Go to Sky Castle Valley (X8:Y12) and choose to pray (祈ってみる) after the event with Mucab. You’ll start to float. Float over the pit at (X12:Y4) and continue. Explore the whole area, floating over everything in sight just because you can. Clear all the trap points around.
When you run into a friendly monster (you get the 友好的な魔物が現れた message), give him the chocolate then beat him up to get a light and dark stone (光る石と闇の石).
(X17:Y15) Select 呼びかける
Enter password: タリア, though if you fail Saul will enter it for you.
Get the Clanzerius Holy Sword that belonged to Rumi’s family. No one can use it yet.
Event complete. You can now take Saul’s Soul Rank over 7.
盟約の聖剣 (Holy Sword of Oaths) quest
Now you’ve done this, go ahead and take the 盟約の聖剣 quest when you’ve gotten Rumi’s Soul Gauge up to 5. Saul’s quest raises her cap so now you can get her up to 7.
Once you get the rank up to 7, report on the quest at the bulletin board. Choose to pull the sword out (気にしないで続けよう) once you’re ready for a fight.
Event battle: Oblis
If you win… Sorry, I mean when you win, ‘cos if you don’t win you get a game over. When you win, Rumi gets a class change. She also learns to equip the Clanzerius Holy Sword. MC will be able to equip it later. If the battle is too hard, do the next dungeon and come back later.
Mist Isle: Preparation
Event, then you can go to the Ethlin shrine. You can’t use magic in the shrine except for a few special areas, so take lots of healing items, those attack magic items you haven’t been using and anything else you think you’re going to need, like keys to open treasure chests or identify items. The mini-map will be sealed unless you use a magic crystal (魔水晶).
Gilbaro gives you a piece of coral (コーラル). There are giant serpents underwater who will help you pass if you give them precious stones. You’ll usually find a piece of coral or something else nearby to feed them with, but you can take some precious stones along just in case.
Another area where you have to clear all the enemies. Enemies mainly like fish and wine bait (魚肉や酒類) so take some with you. You don’t need to clear them all if you just want to finish the stage, but that’s the only way to get a Clan fragment you need for the next dungeon so you might as well get it now.
Ethlin Shrine: Offshore from Mist Isle
(X16:Y6): Give the Coral Gilbaro gave you to the serpent to cross over. Any other precious stone will work too.
(X16:Y0): Event battle.
Event battle: 4x Merman
You get Coral for winning.
(X12:Y0): Event.
Mints knows what to do about the magic door – make a key that opens everything! Go back to the Rondoel to discuss how to make one.
Rondoel
Take the 作戦:魔元素の鍵 quest from the bulletin board.
You need 1 moonstone. Most likely you don’t have one, so go see Gilbaro at Mist Isle.
Mist Isle
Gilbaro will tell you to either buy one from the dwarf shop (45000GP, aiiieeee!) or go dig for one yourself, and he’ll unlock a secret mine for you to explore.
Valhall Island Level Secret Mine
(X6:Y6): Enter password to continue: オブリス.
(X6:Y9): Clan fragment!
(X18:Y10): Moonstone, at last!
(X18:Y15): Enter password:バール.
(X4:Y1): Warp mirror to (X12:Y11).
(X12:Y11): Warp mirror to (X4:Y1).
You get a great piece of equipment for clearing all the trap points you can find. You can explore the rest of the mine even further once Eltha learns Force Wing at level 30 or Chupp learns Dragon Wing also at level 30.
Rondoel
Hand in the moonstone by selecting the quest on the bulletin board then head to the basement with Mints. Take Mints along on your next trip underwater.
Mist Isle
Talk to Gilbaro about Mormen (not Mermen). You can buy whiskey or brandy (ウイスキーやブランデー) to use as bait if you don’t have any already, but you’ll get some very soon.
Ethlin Standing Pillars
(X3:Y9): Event battle.
Event battle: Merman×1, Mooman×1
Get whiskey.
(X15:Y11): Event. Plant the whiskey or brandy as bait and prepare for battle.
Event battle: Morman x 3
Don’t fight back! Just defend until they use a special electric attack. They’ll run away. Now you’ve got the magic key (魔元素の鍵) that can open any door in the game. You can go back and explore now or wait till later.
Doors you couldn’t open before
Inshilin BF 1 (X18:Y7) door
(X18:Y0): Clan fragment. There’s other stuff on the floor you can get, but this is the only one you absolutely need.
Inshilin BF4 Burial chamber (X12:Y18). You need to float to even get to it, so come back when Eltha/Chupp hit lvl. 30
Eselgard Fortress 2F Southwest (X8:Y16)
Eselgard Fortress 2F Northwest (X8:Y2): Clan Fragment.
(X15:Y9)
Ethlin Shrine Priest Living Area
(X:12 Y:0): Door you opened with the magic key.
(X:6 Y:18): Treasure. Actually I think I’m going to skip the treasure explanations from now on. Gotta leave something for you to explore, right?
(X:15 Y:13): Serpent appears. You can give him a precious stone or use the currents to cross over.
(X:7 Y:9): Step into current to move to (X:3 Y:9).
From there step into the current again to move to (X:12 Y:7).
(X:15 Y:8): Event where a dumb skullcap spills the beans about Charon’s current hideout. Thanks dude.
(X:7 Y:4): Event battle
Event battle: Skullcap x3
(X:3 Y:2): Boss battle against Charon. He’s undead so have some undead-strong weapons ready.
Boss battle: Charon, Basilisk
Jump in the water and let the current take you southeast.
Ethlin Most Holy Place
(X:5 Y:7): Serpent + precious stone = get across.
You need to clear both trap points in the Most Holy Place.
Step into the current at (X:4 Y:9) or (X:5 Y:8)→ Step into the current at (X:5 Y:14)→ Trap point (X:1 Y:18) to clear both. These should be the last trap points in the dungeon, netting you a Clan Fragment.
If you’ve collected all 7 Clan Fragments (someone reminded me that there’s one in the general store as well), you get an event. Go to Arlentil later and talk to Windol to get the Star Staff “Clannarin”. Gilbaro will also give you a reward for clearing the dungeon, so talk to him later.
(X:11 Y:19): Serpent + precious stone
(X:15 Y:14): Boss battle.
Boss Battle: Serpent
End of Ethlin Shrine events. Return to Rondoel.
Rondoel
Return to Rondoel and report on the quest.
If you go to Arlentil (which you should if you have all 7 Clan Fragments), Eltha will say she can feel the magic stone nearby (long story, but basically Popolog is after a magic stone Charon is carrying).
New bulletin board quest: 課題:イスリージュの奪取.
Your mission, should you choose to accept it, is to go to Inshilin B1 (X:1Y:18) to fight Charon for the last time. Clearing this quest should lift the cap on Popolog’s soul rank, so you can raise his Rank past level 7. Finishing the events of Ethlin will also remove the cap on Lolon’s soul rank.
Back at Rondoel, select the next quest on the bulletin board: 作戦:魔城への進軍. Choose to set out (出発する) when the choice comes up to leave for Demon Castle Greygol, but only when you’re ready for some fighting. And remember to save!
Mini-event.
Event battle: Wyvern + 2 more wyverns summoned mid-battle. Conserve your MP and Union Gauge for the next battle:
Event battle: Ol=Wyvern
Gromburg [GOBU]
Go to the castle and then come back to the Rondoel.
You can’t continue the story unless you have the Clannarion (Eltha’s staff from collecting the Clan Fragments) and Rumi’s sword, gotten by clearing the 星の杖 and 盟約の聖剣 quests respectively. The first should be done already. The other has been available for a while, but if you haven’t done it yet, Ctrl+F for 盟約の聖剣 and follow the instructions.
Right. Now that you’ve got both super-weapons (a feat which will also lift the cap on Mints’ Soul Rank), go back to Gromburg Castle and talk to the old guy. Now you can go the next dungeon, the Path of the Dead (死霊の道).
Path of the Dead [PADE]
Path of the Dead: Garden of Darkness
Another stage where you need to clear all the trap points, IIRC.
If you have Chupp in your party, see if she can charm some Dark Kobolds (ダークコボルト) to use as slaves. They’re pretty strong. I used two all the way to the bonus dungeon boss and they hit like Abrams tanks.
Path of the Dead: North Cemetery
There are points here you can’t pass until you can float. You’ll be able to float later in the stage, so just ignore points like the treasure chest at (X:12 Y:12) for now. Stick to the graves as you walk. There are damage floors everywhere but where the graves are.
(X:16 Y:5): Event + quest that requires you to clear all trap points if you haven’t done so already.
Path of the Dead: West Cemetery
Nothing of note.
Path of the Dead: South Cemetery
(X:1 Y:19): Lift the latch to open up a shortcut.
Path of the Dead: West Cemetery
Nothing of note except some treasure.
Path of the Dead: North Cemetery
(X:16 Y:5): Touch the spring again after clearing all the trap points in the cemetery. Now you can float! From now on you will automatically enter float status whenever you enter the cemetery.
Path of the Dead: East Cemetery
(X:13 Y:0): Hmm, the FAQ says you can’t clear this trap point if you enter it from the south. A bug, maybe?
Path of the Dead: Garden of Darkness
(X:17 Y:8):Warp point to Path of the Dead: Garden of Ladies.
Path of the Dead: Garden of Ladies
(X:11 Y:10):Warning from Vampire lady: don’t attack any vampire ladies you encounter.
They won’t attack you either, so just walk away. IIRC nothing bad happens if you attack them, but they use Dispel a lot, and if they dispel your float (along with any other beneficial magic like Force Magic) you’ll have to go back to the previous stage to get it back. I suffered much at the hands of these Dispel-casting vampire ladies, so just ignore them like the game says unless Eltha/Chupp have hit level 30 and have float spells available.
(X:1 Y:7): Warp point to the Garden of Nobles.
Path of the Dead: Garden of Nobles
(X:15 Y:11): Warp point to Garden of Ladies (X:1 Y:7). Unlock the shortcut there.
(X:15 Y:5): Boss battle against Almadel.
Event battle: Vampire Lord Almadel
You get a piece of equipment plus the map to the Demon Castle for beating him.
Step into the warp point north to go to the Demon Castle, the final dungeon. Btw, you get some good headgear for clearing all traps in the Path of the Dead.
Demon Castle Greygol [DCGR]
Thanks to Almadel you have a map for the whole castle, so you don’t really need any help.
Demon Castle Greygol 1F: Castle entrance
The two trap points up ahead are good grinding points, but watch out for the vampire ladies and their dispel!
Demon Castle Greygol 2F Hall of Time Mirrors
The mirrors are set out in the shape of a clock. Step into them all in turn.
- 1 o’clock: Treasure on 1F.
- 2 o’clock: This floor.
- 3 o’clock: Maze of Darkness.
- 4 o’clock: Fire-walking Path.
- 5 o’clock: 5F Floating corridor.
- 6 o’clock: 6F Floating corridor.
- 7 o’clock: 7F Floating corridor.
- 8 o’clock: Clear Prison.
- 9 o’clock: Déjà vu Corridor.
- 10 o’clock: Long Corridor.
- 11 o’clock: Hall of Death and Destruction.
- 12 o’clock: Door to postgame dungeon, unusable now.
Demon Castle Greygol: 3F Maze of Darkness
(X:2 Y:9) Use steps to go down to 4F.
Don’t bother exploring, you’ll be coming here a lot.
Demon Castle Greygol: 4F Fire-walking Path
Horrible, horrible room full of pitfalls that lead to 3F. The basic idea is that the square area around each lamp contains pitfalls. You have to avoid getting close to the flames as you walk. That’s the theory. In practice: I saved every other step and reloaded when I fell down. Which was often. Well, good luck!
Fall down on purpose at (X:8-10 Y:16) and (X:8 Y:2) to get some treasure. Fall down at (X:16 Y:10) and climb up from the third floor to pass the seemingly impassable area. Figure the rest out yourself. Unlock the door, step into the mirror, go back to 2F.
Demon Castle Greygol 5F-7F: Floating Corridor
Nothing remarkable. Jump down when you’re told to and climb up when you have to.
Unlock the door at 7F (X:9 Y:11) before going to the 8th floor.
Demon Castle Greygol 8F: Clear Prison
(X:9 Y:7): Treasure chest you can only get if you’re floating.
(X:9 Y:10): Boss battle.
Boss battle: Ol=Peide. Do your thing.
Demon Castle Greygol 9F: Déjà vu Corridor
Use a magic crystal to display the map so you don’t walk around in circles forever. There are two hidden doors. If you get stuck, investigate any place that looks suspicious and that you can’t reach by the warp points dotted around.
Demon Castle Greygol 10F: Long Corridor
Use another magic crystal to make things easy.
The trap point enemies here are postgame-dungeon levels kind of strong. I’d save first before trying to fight one, and don’t be afraid to run if you can.
Boss battle coming up. The trap enemies are harder than the boss ^_^;;
Boss battle: Ol=Piros
You get the nice Memento-Piros (メメントピロス) accessory for winning. Now MC can equip the Clanzerius Holy Sword.
Return to 2F and step into the next mirror. Wait no, go home and heal up and save first.
Demon Castle Greygol 11F: Hall Of Death and Destruction.
Boss battle.
Boss battle: Ol=Eraste
Memento-Eraste (メメントエラステ) GET! Cheesy event also GET!
Demon Castle Greygol 12F: King’s Room
Two boss battles in a row with a rest in between. Touch the enemy symbol when you’re ready. You did save before, right?
Boss battle: Elder Wyvern
You can leave after beating the Wyvern, but when you come back you’ll have to fight it again for no EXP. Only leave if you’re in dire straits. Conserve your Union Gauge as much as possible.
Final boss! Ol=Ohma, 2x Ol=Servant
If you’ve come this far you don’t really need any tips. But according to the FAQ:
Wear armor that’s strong against Dark attacks. At the very least don’t wear anything with the light (光) element. Bring as many Fake Dolls (フェイクドール) as you can find to keep party members from being taken out of battle. If you’re not planning to do the postgame content, you can go back in time and give Eltha a healer sub-class about 10 hours ago so she can use an amped Holy Light against the boss. :-p
If you’re still reading you must have killed the boss by now.
Enjoy your happy ending!
Or, if you’re really greedy, you can do the Postgame dungeons:
Rondoel [POGA]
Go to Gromburg to see Rumi. She’ll suggest having a party. Return to Rondoel and select the new →「作戦:再会の宴」quest.
If you talk to Mints in your room he will tell you that he can now synthesize precious stones. Get the ingredients to fulfil the quest. Chances are you’ll have at least some of them in your inventory. The rest can be bought from stores:
Ultimate Meat (最高の獣肉) = Gromburg
Special Chicken (特別な鳥肉) Legendary Vegetables (幻の野菜) = Arlentil
Legendary Roe (幻の魚卵), Legendary Fin (幻の魚ヒレ) = Mist Isle
Head to the demon castle after the events.
Demon Castle Greygol 2F Hall of Mirrors.
A battle against the Phoenix will ensue when you touch the 12th mirror you couldn’t enter before.
Event battle: Ol=Phoenix
She’s light element so if you have any dark weapons and magic let her have it with both barrels. I forgot how it happened but she wiped me out once so I wouldn’t underestimate her if I were you. Head to Artlentil after the post-battle events.
Arlentil
Blah blah talky talky blah. Blah.
Rondoel
You have to get everyone’s soul rank up to at least 7 to revive Merlin. Use their favorite foods and take them out into battle. It’s a good time to do a little grinding because the late postgame battles can be tough. Once every party member is at soul rank 7, go back to your room and wake Merlin up. She’ll want to test your resolve. The test is another battle against Phoenix, same as the last time.
Event battle: Phoenix
She will refill your SP gauge to full before the fight starts. It is just a test, after all.
Merlin will join your party at level 1. She has the same Variant class as the MC so raise her however you like. Chances are she won’t get that high in level before you finish the post-game, so I found it best to let her specialize in support skills, mainly raising the Union gauge so we could use it over and over again. Whatever you choose to do with her she’s a pretty useful character so put her in your party right away. Or not, if you like a bit of extra challenge.
You can now give your MC a sub-class. Phew, finally!
Revisiting all the dungeons
After Merlin is revived, for story reasons you have to go back to all the dungeons you’ve cleared and investigate mirrors found in them (marked on the map with a red warp gate). Each mirror contains a dungeon. You can clear them in any order you want. You’ll need a character with the float spell (Force Wing, etc) for most of these dungeons, or in a pinch you can make do with a party of only auto-float characters like MC and Rumi.
Mirror Maze – Old valley
The mirror is in Fumi Valley, Valley of Giants (X:8 Y:16). Some areas on the map will dispel your float and you’ll need to cast it again, so take some MP refilling items and keep enough MP to cast Flight Home so you don’t get perma-stuck. Also take anti-Spirit weapons because the boss is a spirit. Clear all the traps using shining stones (光る石) and special flour (特別な麦粉) as bait to make the boss appear.
Boss battle: Elder Golem
Receive a mirror fragment for defeating him.
Mirror Maze – Great Demon Forest
In Morlock forest, the mirror is at (X:18 Y:2) of the Demon Forest. Use expensive vegetables (高価な野菜) and magic herbs (マジックハーブ) to clear all the trap points and release the boss.
Boss battle: Nephilim
Apparently poison and confuse work on him if you care to try. Receive another mirror fragment for winning.
Mirror Maze – Shrine Room
The mirror is at (X:9 Y:0) in Inshilin floor 2. Use ramen and other delicacies to clear the traps. Anti-undead weapons help a lot against this boss. There are Light, Dark and Dragon plates on the walls that open and close certain areas. You basically have to press a plate, explore as far as you can go, press another plate, explore some more, etc.
(X:9 Y:14): Plate on wall.
(X:8 Y:16):Can’t pass here if you’ve pressed a Light plate.
(X:10 Y:16): Can’t pass here if you’ve pressed a Dragon plate.
(X:11 Y:14): Plate on wall.
(X:14 Y:16): Can’t pass here if you’ve pressed a Light plate.
(X:14 Y:14): Can’t pass here if you’ve pressed a Dark plate.
(X:15 Y:11): Can’t pass here if you’ve pressed a Dragon plate.
(X:11 Y:3): Plate on wall.
(X:13 Y:7): Can’t pass here if you’ve pressed a Dark plate.
(X:12 Y:5): Can’t pass here if you’ve pressed a Dragon plate.
(X:16 Y:2): Can’t pass here if you’ve pressed a Light plate.
(X:1 Y:2): Plate on wall.
(X:3 Y:10): Can’t pass here if you’ve pressed a Dragon plate.
(X:9 Y:5): Can’t pass here if you’ve pressed a Dark plate.
Boss battle: Noble Maiden + 2 Vampires
Watch out for charm as you beat the stuffing out of her. Get another mirror fragment for winning.
Mirror Maze – Deathmatch Arena
The mirror is at (X:13 Y:6) in the Northwest area of Eselgard, northwest of where you fought the dragon zombie. You don’t need float to finish this particular dungeon, but it helps you avoid a ton of damage floors and get at least one treasure chest you can’t reach otherwise.
(X:5 Y:7): The gate will open as you approach.
Fill the trap points will high quality chicken (上等な鳥肉) and roast chicken then take out the boss to get another mirror fragment.
Boss battle: Behemoth
Quite susceptible to Confuse.
Mirror Maze God Era Floor Baal’s Pit
The Mirror is in the hidden mining area (where you got the moonstone) in Valhalla Mines, (X:9 Y:6). Use brandy (ブランデー) or edible rocks (食岩) to bait the traps.
(X:19 Y:9): Warp mirror.
↓↑
(X:13 Y:11): Warp mirror.
(X:13 Y:5): Warp mirror.
↓↑
(X:18 Y:1): Warp mirror.
(X:7 Y:7): Warp mirror.
↓↑
(X:4 Y:7): Warp mirror.
(X:9 Y:0): Warp mirror.
↓↑
(X:6 Y:10): Warp mirror.
Boss battle: Jormungand
Can be silenced if you try hard enough.
Mirror Maze – Undersea Ruins
Ethilin Shine, Most Holy Place (X:17 Y:18) is where you’ll find the mirror. Use high-quality fish or shellfish (高級魚肉・高級魚貝) for the traps. You can’t use magic in most places except areas behind doors marked 《渇きの回廊》so don’t worry about floating.
(X:3 Y:4): Area where you can use spells.
(X:3 Y:9): Area where you can use spells.
(X:5 Y:15): Area where you can use spells.
The boss will appear as soon as you clear the final trap, so make sure the last trap you clear is in an area where you can use spells so you can get one up on the boss.
Boss battle: King Kraken
Susceptible to Confuse.
Mirror Maze Dead Dragon’s Garden
(X:12 Y:17). Path of the Death, in the northern part of the cemetery.
Watch out for the areas that dispel your float. Watch out for damage floors. Bring special meat (特別な獣肉) and dark stones (闇の石) for the traps.
Boss battle: Death Dragon, Dranscale
Confuse works on both of them. Usual mirror fragment for winning.
Demon Castle Greygol 2F Hall of Time Mirrors
After gathering the 7 fragments, return here to see that the 12 o’clock mirror has been restored. This mirror leads to the bonus dungeon proper, but first…
Boss battle: Kisskill Lira
Watch out for charm then steamroll all over her and make your way to the bonus dungeon. Bring lots of different kinds of bait so you don’t have to make too many trips outside.
Hades Castle 1F Purgatory
(X:1 Y:18): Treasure chest containing Baalnite (バールナイト). I think I mentioned before that you need 40 Baalnites to get the ultimate axe (talk to the dwarf village chief postgame). Hope you haven’t sold any so far.
(X:7 Y:15): Clear the 4 trap points to unlock the door.
(X:11 Y:15): Clear the 4 trap points to unlock the door.
(X:9 Y:13): Boss battle
Boss battle: Scare=Eraste, Scare=Piros
They’re pretty strong and use charm (twice every four turns) frequently, so don’t hold back.
Hades Castle 2F Hall of the Dark King
(X:9Y: 13): Clear the 4 trap points to unlock the door.
(X:9 Y:6): Stairway to 3F, but before that…
Boss battle: Scare=Ohma, Ol=Servant x2
He’s strong and uses charm very frequently. Take your strongest party members and pull out all the stops. If your MC has Last Desire, this is the time to use, use and use it again, especially to block spells and special attacks. If s/he doesn’t and you’re struggling, I strongly recommend grinding a bit until you get it.
Hades Castle 3F Hall of the King of Hades
You must float to get through this level, but you wouldn’t have made it this far if you didn’t have float.
(X:12 Y:10): Clear the 4 trap points to unlock the door.
(X:6 Y:10): Clear the 4 trap points to unlock the door.
(X:9 Y:13): Battle against Lucifer.
Warning: if you drink the cup he offers (杯を干す) before the battle, you will start the battle with 0 SP! Apparently you get a different bit of conversation after battle for doing so, just FYI.
Boss battle: Lucifer, Kisskill Lira
Focus on getting Kisskill Lira out of the way ASAP, makes things a lot easier. He’ll summon Noble Maidens to replace her, but they’re not as annoying as Lira. You can refer to the strategy I used to beat them here, but if you beat Scare=Ohma you’re probably okay.
Rondoel
Return to Rondoel after beating Lucifer and report on the 冥府の城 strategy on the quest board. Congratulations, you just finished the post game! If you really want to fight Lucifer again, go kill 300 monsters and a quest will open up that lets you fight him. Apart from that, you’re done. On to the next dungeon crawler!


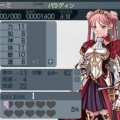
Wow, that’s… brilliant! Now that’s what I call dedication.
And guess what? I was just about to purchase Entaku no Seito, and this amazing walkthrough of yours is just giving me even more incentive. And since there’s a nice Amazon link in the intro, I’m going to use it to purchase the game. ^_^
Thanks a lot for this great piece of work. I’ll make good use of it once I get my paws on a copy of Entaku no Seito! 😀
Thank you ^__^ I’m just summarizing a Japanese FAQ, though. It’s not my original work.
Entaku is a pretty straightforward game so I don’t think you’ll need a FAQ except for a few spots like the springs in Inshilin. I’ll try to have the rest up soon.
This is perfect! I can’t say thank you enough. And as promised I will love you forever!!!!! You have a permanent friend here for life!!!
Forgot say say I hope you feel better soon! : )
Thank *achoo* you *snf* Let me know if any of the directions are wrong or if you get stuck somewhere and I’ll try to help.
Great job on this. You are amazing! Can’t wait to use it. This will help us non Japanese speakers out immensely!
Good luck out there!
I wanted to let you know the faq is going great so far! The only problem I had was the soup making quest tutorial. So I just made lots of stuff until I got the right soup 🙂 now off into the forest!
All’s well then. I’ll add a note later about party member’s favorite foods so you don’t waste ingredients cooking stuff nobody likes.
I do have a quick question, what items can revive party members?
不死鳥の羽 - Can’t be used in battle.
不死鳥の尾羽 – Revives with 1 HP.
不死鳥の涙 – Revives with full HP. Can’t be used in battle.
竜神の血 – Same as above. Ultra-rare. I never saw one in my game.
IIRC Healers also learn a Revive spell eventually.
Thanks that helps a lot!
Wow, this is super useful. I might just give this game a try now, thank you. Are you going to provide a basic useful items list too?
Probably a quick list of any item you should really look out for and a translation of what skills/spells do, but no more than that.
Oh, the skill and spells translations sound immensely useful. With all that information, it should be more than enough for one to enjoy the game, so thank you.
This walk through is helping me out so much. Thank you for taking the time to do this!
You’re welcome. I’m almost up to the last dungeon now.
Wow you got this done fast! Looking forward to the rest!!
Note that text hooking is possible for the PSP version of this game. That makes it much easier to look up unknown words/kanji as you play without the hassle of using online dictionaries and time-consuming radical searches.
http://i.imgur.com/ZFiTlLx.png
Oooh! o.o I’ve never emulated a PSP game before. What a convenient feature! If only it was that easy to just translate the lines and feed them back into the program.
I haven’t heard of this development before.
Can you give me a link to the website of this text hooking program?
Not the guy you’re talking to, but I did find a link to this promising-looking topic: http://forums.fuwanovel.net/topic/5522-emulated-psp-game-text-hooker/
I forgot to ask this earlier and I wish I had now I think I need to start the game over, what stats are what? When a character gains a level I just put the points into a random stat. 🙁
Oh, right. I should include something on that in the post. Basic guide:
力 = Strength. Improves physical attacks. Raise for physical attackers, ignore for magic users.
知 = Wisdom. Improves magic attacks. Increases MP. Raise for magic attackers, ignore for everyone else.
神 = Piety. Improves healing magic. Improves damage from light skills. Improves resistance to status effects. Increases MP. Raise for support skill users, anyone who needs more MP.
体 = Vitality. Increases HP. Improves Defense. You won’t go wrong putting a few points into this from time to time.
敏 = Agility. Improves dodging. Improves accuracy. Improves attack for sub-weapon. Improves speed in turn order. Most important stat. Raise for everyone except healers. If you level up and don’t know what to add points to, add it to Agility.
運 = Improves attack for non-elemental magic. Improves activation rate of all luck-based skills. Improves chance of avoiding status effects. Put a few points here from time to time.
Thanks!! 32 hours into the game, but that’s OK I’ll just restart so I can redo the stats. I am really enjoying this game and your walk through you are awesome! !
Another thing i was curious about was how do tell the different weapon types? Like spear or bow? I seen you suggested to equip a back character with one of these.
Read the weapon description. It should have a kanji in there that tells the type, e.g. 剣 for sword, 短剣 for dagger, 弓 for bow, 槍 for spear, 杖 for staff, etc. I may also be confusing this game with Tsurugi no Machi, but when you equip it there should be an L, M or S indicator somewhere on the equip screen telling you whether it’s a long-, medium- or short-range weapon.
Unless you’ve made a complete and utter mess of the MC (very hard to do), don’t restart. Everyone else can be salvaged or substituted, since you will eventually have more party members than you have space for.
OK got it, thank you so much and I won’t start over I’ll keep going. Now I can focus the stats I want too yay!! Hopefully I will be OK for post dungeon and super boss 🙂
This is great. Do you still plan on doing the skills list and post dungeon? That would be a really big help. Keep up the good work!
I most certainly do. I’ve been a bit busy with real life/SMT IV lately, but I’m still working on the skill/spell list. The post dungeon will have to wait a while though.
Thank you sooooooooooo much kina!!!!!!!!!!! I’m making my way through with no problems. The skills list is REALLY coming in handy!
You’re welcome.
Hi. I was wondering if you could help me with something. I’m helping with some translation of this game and was wondering what the best transition for
完.
受
受完
Was. Thank you!!
Hard to say without more context. I’m going to assume this refers to quests, so 完 = completed, 受 = Accepted, 受完 = Accepted and completed. Good luck with the patch!
Ahhh! That’s it! Thank you so much!!
Oooooooooh! I’m soooooooooo sooooooooooorry!!!!! I am so rude!!! (Falls on floor with hands clasped begging for forgiveness)(sorry playing code realize guardians of rebirth and Impy is my favorite character) (quickly jumps up and makes VERY sad nep nep face) I finished this game and didn’t even tell you OR thank you for the AMAZING job. My back log was getting out of control for my vita. I finished demon gaze after this then ended up playing the whole nep nep neppy trilogy. Now I’m playing code realize while waiting for stranger in sword city in april. (Oh well I guess trillion god of destruction will have to tide me over until then!) I’m sooo hooked on these dungeon rpgs. So again thank for helping me enjoy this at some game!!
You’re welcome. Glad I could be of help. I really should finish this walkthrough sometime.
And just when I was dreading missing and having to scour the whole game for a missing Cran piece, or just the general absolute lack of information on the game, this guide of yours for the goddamn PSP version comes in clutch. God bless you.
Though as much as I love experience and am grateful to have this resource, the fact that this guide works nearly 1:1 this does kinda show their laziness…
I was surprised to hear that, actually. It’s a rather old game, so I thought the remake would have a few new dungeons, maybe some new classes liek SoSC: Revisited, etc. Well at least the walkthrough is useful to someone. Enjoy!